

Two-pack paint is a popular and also a special kind of paint that is always used to paint cabinets, cupboards and other similar surfaces.
This type of paint always uses a hardener together with the paint to strengthen the surface making it last longer and also shielding it away from damages such as scratches.
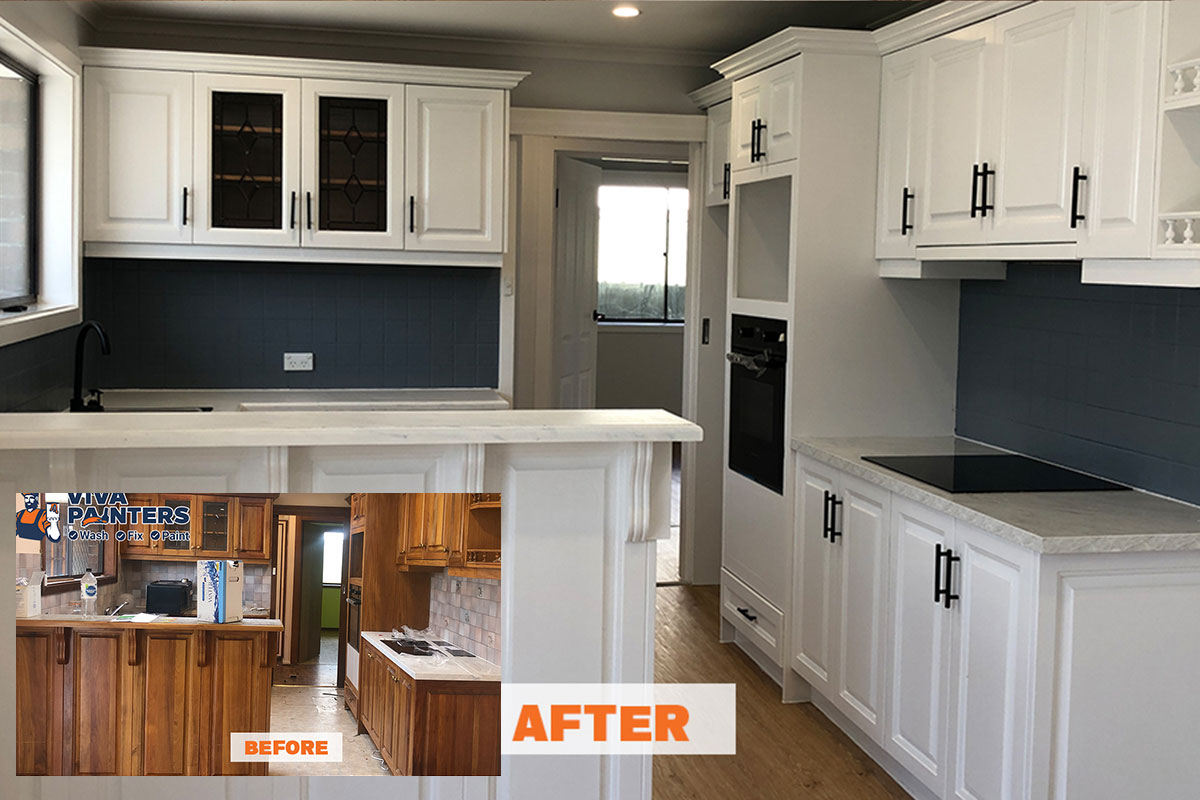
Revamping your kitchen cabinets may take up different directions depending on the budget that you have in place.
For instance, some methods are considered to be budget-friendly while some involve tearing apart the whole room and beginning everything from scratch.
If you are on a strict budget, then, renovating your kitchen cabinets using a lick of paint is the best way to go!
Are you thinking of trying to paint your kitchen cabinets using two-pack paint on your own? If so, then in this post, we have you covered with expert tips and advice from professional Cabinetry Painters!
Steps to Paint Kitchen With Two Pack
Follow the below-detailed steps to paint your kitchen cabinets using a fresh coat of two-pack paint:
1. Sand the Cabinet
Two-pack paint always acts as the shield of your cabinet. In this case, the molecules found on its layers will not perfectly match the new paint.
To aid with its adhesion, you will need to get rid of the hardener’s layer and the best way to have it done is to sand the cabinet.
Since it will lead to lots of dirt from the layers, you may choose to remove the cabinet from the room. Besides that, due to the dust particles that will be from the cabinet, you should wear a mask.
Finish the whole process by ensuring that most of the surfaces are rough and the finish is gone.
2. Clean the Cabinet with Acetone
Here, all that you will need in place is white cloth and acetone. You may also have many pieces of cloth.
Proceed by dipping the cloth in the acetone and wiping the entire cabinet. The acetone will get rid of the latex paint on the cabinet. At times it may not remove all the paints but it will make them dull.
Use the pieces of clothes at intervals to prevent dust from gathering on the cabinet’s surface.
3. Prepare the Room
As the cabinet dries, you may take that chance to prepare the room for a new coat of paint.
Depending on your case, if you’re painting in the interior, you need to cover the floor, walls, ceiling and even other surfaces that you may want to prevent the paint using tarps.
When you were painting outside, then, you may use a single tarp on the cement or grass.
You also need to note that before you start painting, you need to check the temperature. At times, if the temperature isn’t favourable outside, you may choose to do it indoors.
Take note that too hot or too cold temperatures have higher chances of affecting the paint’s performance more so adhering to the cabinet’s surface.
The same applies to humidity.
You need to keep in mind that if the weather is too humid, then there are higher chances of declined performance of the paint in terms of consistency and quality.
Concerning that, latex paint always performs so well at temperatures ranging from 50 and 85 degrees Fahrenheit.
If the outside temperature is higher, then, it’s wise if you move your cabinet indoors for good painting.
4. Paint the Cabinet
Before you rush to paint your cabinet, you need to know that the simplest way to do it and also ensure that equal coverage of the paint is only by using a spray painter.
In this case, you have two alternatives of spray painters that you may use.
The first one that you can go for is an airless spray painter. This kind of spray painter attaches to your paint can.
All that you have to do is to spray paint by pressing the trigger. It’s always a good choice if you are only after some little painting.
The next one is always considered to be rather heavy-duty and also expensive.
After settling on any of them, ensure you spray an even coat of paint all over the cabinet.
Wait for the paint to dry.
You may also choose to spray more layers of paint after that until you’re completely satisfied.
5. Allow the Cabinet to Dry
Immediately you’re completely convinced with the number of layers of the paint, you need to allow it to dry overnight.
You also need to remember to leave the windows open to allow the fume to escape if you painted inside.
When you painted outside, then you don’t have to worry about inhaling the fumes, though you still need to check on the weather forecast to be safer.
6. Re-Apply Finish
At this step, your cabinet will have a new coat of paint.
If you were only after a new coat of paint, then you may call it done at this step.
However, if you want an attractive finish of two-pack paint, you may proceed to paint a new finish to the cabinet.
The earlier sanding can aid the finish to adhere to the cabinet perfectly.
Before you choose to handle the application of two-pack paint, you may need to contact a professional from any licensed firm such as Viva Painters since it has poisonous fumes.
They will help you safely apply it!
Benefits of Two-Pack Paint
You may be wondering whether two-pack paint that is considered to be toxic has benefits, isn’t that so?
Well, trust me or not, there are several benefits of two-pack paint that you’ll like. They include:
- Attractive appearance
Many people across the globe use two-pack paint because of its attractive appearance. It makes surfaces look posh and modern. It will always change an old-fashioned cabinet to something rather lavish and complicated.
- Does not peel off
Many materials or paints with time do peel off when exposed to moisture or higher temperatures as in the case of kitchen cabinets. However, two-pack paint maintains its quality and never moves an inch less.
- Multiple colour choices
Two-pack paint does come along with multiple colour choices to choose from. It’s very difficult to miss your preferred colour choice that is common to other materials.
Other benefits include:
- Water-resistant
- Hardened exterior
- Scratch-resistant
- Heat resistant
- Among many others.
Author: Viva Painters
Viva Painters are Adelaide’s leading painting and decorating service providers. Our blogs are written by our supervisors with industry experience and knowledge.. We publish trade based blogs which includes, how-to, news, information and other building trade related information.
 1")